 40G/100G Optical Transceivers
 25G Optical Transceivers
 10G Optical Transceivers
 155M/2.5G Optical Transceivers
 1G Optical Transceivers
 1G BIDI Optical Transceivers
 Dual-Rate Optical Transceivers
 FC 16G/32G Optical Transceivers
 CWDM Optical Transceivers
 DWDM Optical Transceivers
 SGMII Port Optical Transceivers
 XFP Optical Transceivers
 100M/1G/10G Coppers
 Full-Rate AOC & Breakout Series
 10G/40G Active DAC Series
 Full-Rate Passive DAC Series
 40G/100G Passive Breakout DAC Series
 Regular/MTP-MPO Fiber Patch Cords
 MT2011
 MT2010
 CodingBox
 QSFP to SFP Adapter
 首页 > Home > Application Notes > Guidelines For Installing/Upgrading Juniper QFX Switch System Via USB
Guidelines For Installing/Upgrading Juniper QFX Switch System Via USB
Time: 2025-01-14
Juniper switch system files are typically provided in two formats: .tgz installation packages and .img system image files. Moduletek Laboratory previously released Juniper QFX Series Switch System Upgrade Guide, which detailed how to upgrade switches using .tgz installation packages via FTP. This guide demonstrates how to install and upgrade Juniper QFX switches using an .img system image file with a USB boot drive.
1. Create USB Boot Drive
First, confirm the switch model, then download the corresponding .img system image file from Juniper’s official website.
In this demonstration, the switch model is QFX5200-32C, running Junos 18.4R1.8, and the target upgrade version is Junos 20.2.
System image file name: install-media-host-usb-qfx-5e-flex-x86-64-20.2R2.11.img
Note: Official Juniper switch software download page: https://support.juniper.net/support/downloads
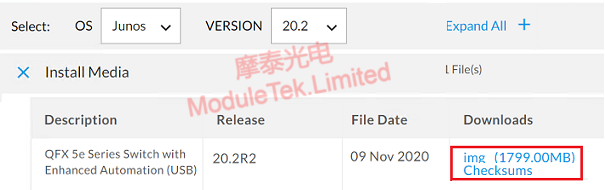
Figure 1 Image File Download Page
Use a disk imaging tool to flash the .img file to a USB drive, creating a bootable USB. Ensure the USB drive is formatted as FAT32 (this step can be completed before flashing the image).
Note: Win32 Disk Imager download address: https://sourceforge.net/projects/win32diskimager
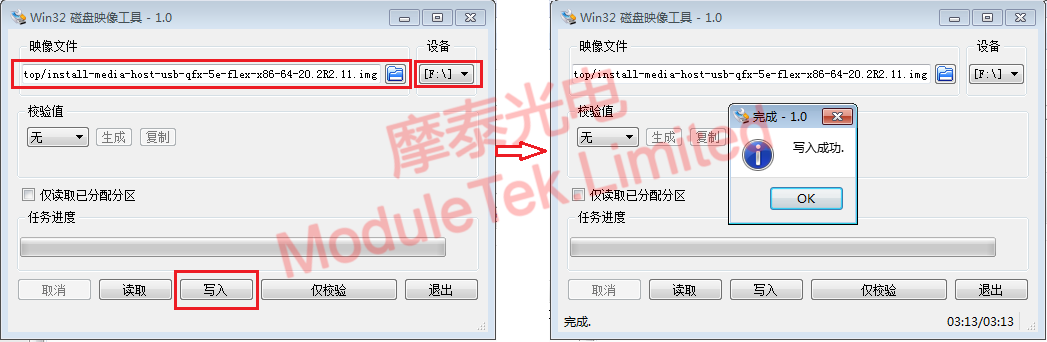
Figure 2 Create USB Boot Drive
After successfully writing the image file to the USB drive, the generated boot files will be visible inside the drive.
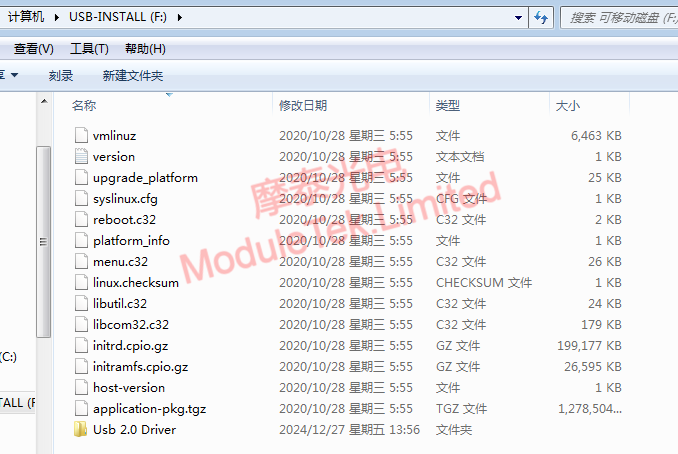
Figure 3 Files in USB Boot Drive
2. Switch System Installation & Upgrade
Insert the prepared USB boot drive into the switch’s USB port, then power on the switch.
When the boot menu appears, select the second option to install the Juniper operating system.

Figure 4 Select System Installation Option
The device will automatically install the system from the USB boot drive and reboot once the installation is complete. This USB-based method supports direct cross-version upgrades, with no version restrictions.
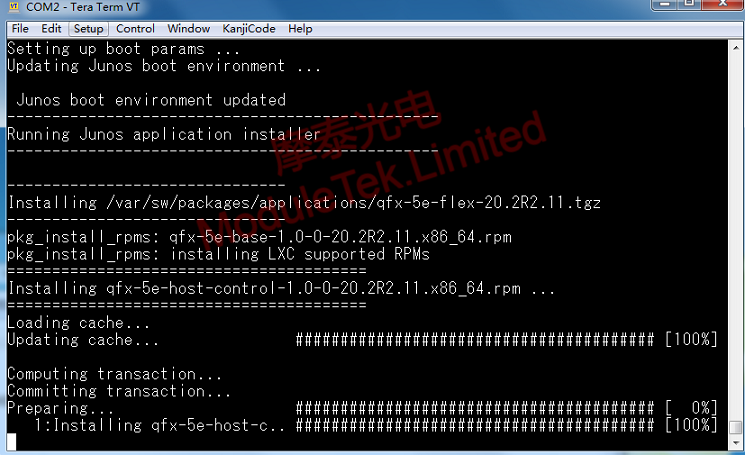
Figure 5 System Installation Progress
After the switch reboots successfully, the upgrade is finished. All original user configurations will be restored to factory defaults. Log in using the root account—no password is required. Finally, verify the switch’s current Junos system version.
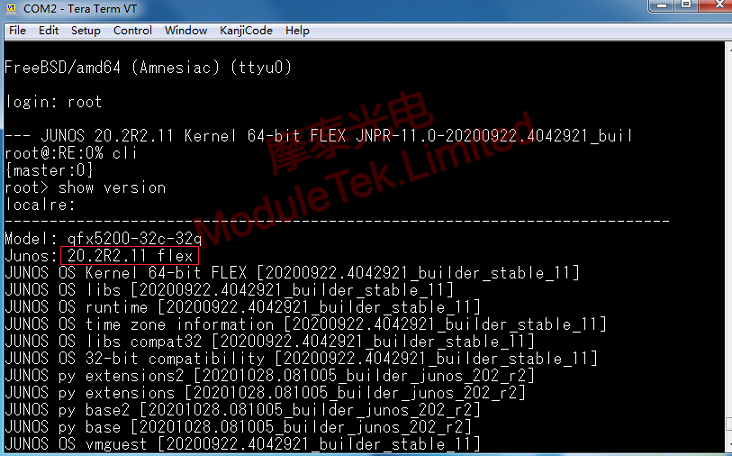
Figure 6 View Switch Current Software Version
Moduletek Limited is at your service.
For further inquiries about the above content, please contact us at: sales@moduletek.com


